What is SEO for photographers other than an unknown term? As a photographer, you may be familiar with many technical terms, but SEO (search engine optimization) may be missing. We’re not suggesting that you learn SEO like a pro, but we do suggest that you have an SEO guide for every photographer handy. This will help you rank your photo sites higher in search results and reach potential customers online, not just with beautiful photos. Interested already?
It can be difficult to know where to start SEO or how to get your site ranked higher on Google. However, there is nothing to worry about. Keep reading this article to learn and follow simple SEO tips for photographers!
Table of Contents
What is SEO for photographers and why is it important?
It’s no secret that SEO is essential for the organic growth of any website and business. For example, let’s say you create a good photography portfolio, but no one finds it online. You won’t get any traffic and therefore you won’t be able to convert them into leads – your photo models. It is like producing high quality products but without being able to sell them on the market.
The world of photography is no different. As a photographer, you might want to sell your photos online or highlight your portfolio to attract clients. But, how do you bring visitors to your website and turn them into customers?
One of the fastest ways to promote your photography is to advertise on various social networks such as Facebook, Instagram, Snapchat, Pinterest, etc.
But paid advertising can cost you a lot of money if you want to get decent exposure and growth. Unfortunately, this growth is not sustainable. If you stop advertising after a certain period of time, you may see a decrease in the growth of your business.
The best way to grow your photography business organically is to get traffic from search engines (Google, Bing, etc.) This is a slow process, but it costs you nothing, and most importantly, the growth is consistent.
For example, if you search “small garden” on Google, you get many results.
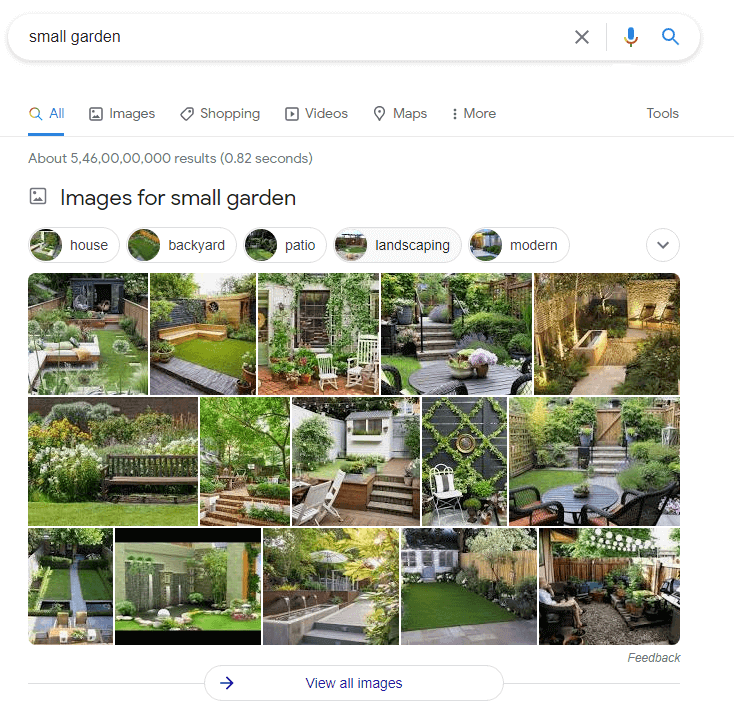
At the top of the page, you’ll see Google garden images.
Why? It’s because of SEO – all these images go through search engine optimization.
So, if you’re a photographer who has compelling images on your blog, you can optimize them so that search engines show your images for relevant search queries. If you don’t already have a blog, it’s never too late to start a blog by following these 5 easy steps.
Now you know the importance of SEO for photography. So, let’s deep dive into the image optimization steps for a photographer.
Best 10 SEO tips for photographers:
- Invest in quality web hosting for your photography site
- Name your photos correctly
- Implement lazy page loading
- Host images on CDN
- Choose the right image format
- Compress images
- Write SEO friendly alt text
- Add images to your sitemap
- Write your page title and description
- Build more backlinks
-
Invest in quality web hosting for your photography site
Unfortunately, having high-quality photos on your website isn’t enough. You have to make sure each image loads fast when someone visits your web page, or it will negatively affect user experience. Even if your website fails to load in under 3 seconds, people will leave and hardly return.
That’s why investing in quality web hosting is very crucial. A quality service doesn’t just speed up your website; it also makes sure your website stays online 24×7, even under traffic spikes, and protects your website from hacks.
Hostings like WP Engine, Kinsta, and SiteGround alternative are best for photography websites. They offer free SSL, CDN, daily malware scan, and 24×7 customer support.
-
Name your photos correctly
Just like you optimize your blog posts or landing pages with proper headlines and keywords, you need to do the same for your images.
By doing so, search engines know what your images are about.
For example, by searching for “royal bengal tiger” on Google, you get many relevant results. This is because each image is appropriately named.
Here’s an example:
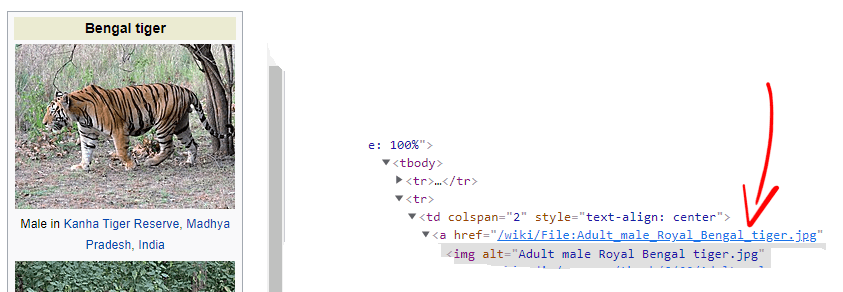
When you export images from your device, they are given a randomly generated name, such as “09122021.png” or “IMG201150.png”.
For this reason, you need to name your images appropriately before uploading them to the web. If your pictures are already uploaded, you need to update their names manually.
-
Implement lazy page loading
Lazy load is a technique that defers loading anything that is not needed, which means that your website will load images visible in the user’s browser area.
Imagine having hundreds of high-quality images on your website. Users would have to wait a long time for your content to load.
By implementing this Lazy Loading technique on your website,
- You can drastically reduce your website’s loading time – which will improve user experience
- You can save your server’s resources
If you visit Depositphotos and browse images quickly, you will notice that they are lazy-loaded.
-
Host images on CDN
Generally, a website is hosted on a single web server. For example, let’s say your website is hosted in Austin, Texas. When someone visits your website from Texas, your web server will load it for the user. The entire process from your webserver to the visitor’s browser happens so fast that it is hardly noticeable.
However, if the visitors are not from the same location, the scenario is different.
If someone from Asia visits your website, then all assets, including images, will have to travel to the user from the US. As a result, the website will load slower.
This is where a CDN comes in handy. A CDN (Content Delivery Network) is a geographically distributed network of servers that provide fast delivery of Internet content.
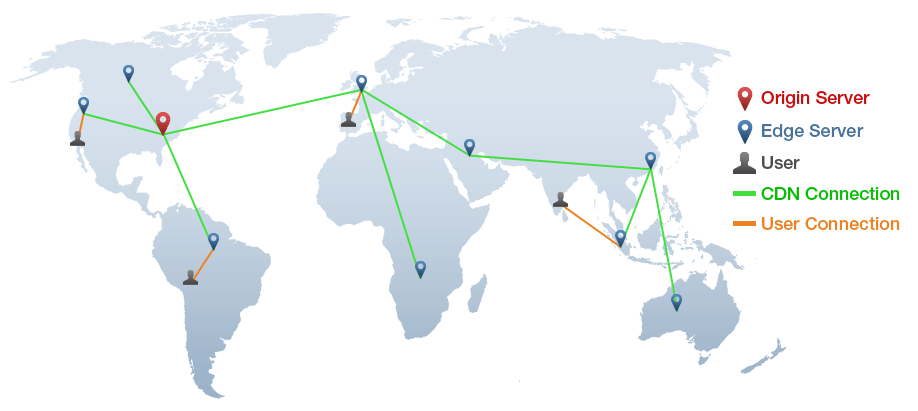
A CDN stores all your website’s static files, including images, to multiple servers located in various locations. So, when a user visits your website from a different continent, the CDN loads your website from the user’s nearest location. This significantly improves your website’s loading time as well as bounce rates. Nowadays, with backend-as-a-service tools like Back4app, it’s now become easier to build your website faster, host it with no hassles and keep full control over your app’s Backend. They use CloudFlare and an ELB DNS name due to the high number of servers, which ensures high availability for your website.
-
Choose the right image format
There are tons of image file types, and among them, PNG, JPEG, WebP, and GIF formats are the most popular and widely used ones on the web.
Each image format has a different compression method and size. However, it’s difficult to say which image format will be best for you. It all depends on the type of image and its purpose.
Here are a few recommendations from us:
- PNG: It produces better image quality, but has a large file size. Use a PNG file if the size isn’t the issue, and if the image is too detailed.
- JPEG: Choose JPEG for online photos and artwork. It is lower in size than PNG, but you may lose some quality.
- WebP: WebP produces high-quality results and is lower in size than PNG and JPEG.
Choose an image format that is supported by major browsers, smaller in size, and most importantly, looks beautiful. We use the PNG format for all of our images.
If the images are larger, we first compress and then upload them to the website. You can ensure your images are well-optimized for your browser by outsourcing through the likes of graphic designers or design agencies.
-
Compress images
You’ve probably heard this phrase before, “a picture is worth a thousand words.” Adding images helps users better understand your content, and it improves engagement on your website.
But images are larger than text and can slow down your website if not optimized.
Imagine how long users have to wait on a website where hundreds of high-quality images are not optimized.
This is why it’s crucial to compress images before uploading them to your website.
Many people believe that optimizing photos decreases image quality – which is not true at all.
There are several image optimization tools that reduce file size without compromising quality.
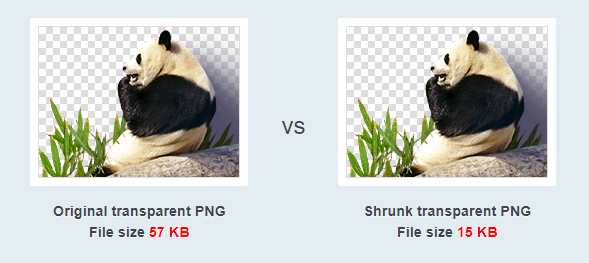
We found that TinyPNG works great in this case. It’s a free online image compression tool that allows you to optimize different image formats such as PNG, JPEG, and WebP.
TinyPNG also has an image optimization plugin for WordPress CMS that compresses all your images automatically.
-
Write SEO friendly alt text
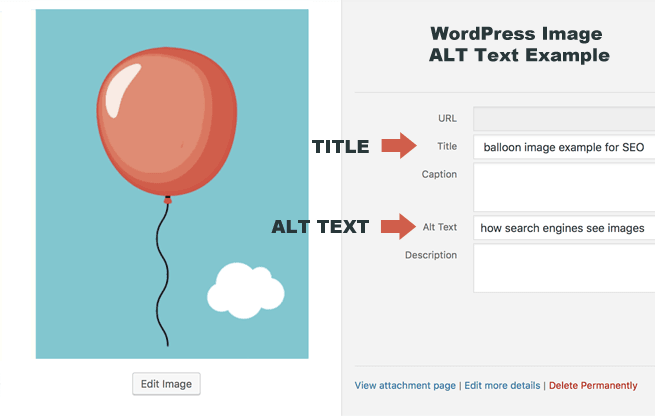
Alt text, also known as Alt attributes, is the alternative text of an image. It describes what the image is about.
Alt text plays a significant role in your overall Image SEO strategy. Image Alt text aims to help visually impaired users who use screen readers when surfing a website.
Sometimes, when an image fails to load on a user’s screen, users see the Alt text to understand what the picture was about.
Here’s an example of image Alt text:
-
Add images to your sitemap
A Sitemap is a file that contains a website’s essential pages, which help search engines find, crawl, and index them. Adding images to your sitemap helps search engines to discover your content faster.
There are several online tools available which you can use to generate Sitemap for your website. Or, if you are using WordPress, you can use the XML generator plugin to generate plugins in one click.
-
Write your page title and description
Page titles and descriptions are a vital part of image SEO. They tell search engines what your page is about, and explain its relation to a user’s search query.
Once users receive their results, the search engine displays page title as well as page description. This is what it looks like:
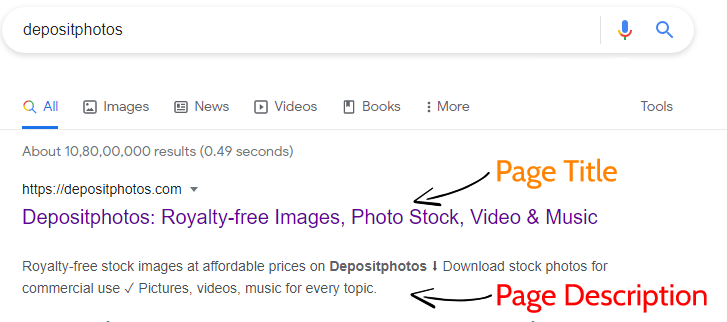
As the title tag is an essential part of On-page SEO, you need to optimize it well with proper keywords. Conversely, poorly written title tags can negatively affect your SEO.
On the other hand, the meta description doesn’t directly impact your website’s ranking, but it can be used to improve CTR (click-through rate) and encourage users to click on you.
Here are some quick tips to improve your page title and description:
- Keep your title length between 60-70 characters
- Make sure your meta description is not too long, allowed up to 160 characters
- Include your target keywords in both the title tag and meta description
- The title and description should be relevant to the content
- Don’t use the same title or description on multiple pages; it confuses Google
- Use power words in your title whenever possible, such as best, cheap, exclusive, etc.
-
Build more backlinks
Backlinks are also known as external links or inbound links. In simple words, when a website links to your website, you get a backlink. Therefore, backlinks have an essential role in improving your website’s SEO.
Search engines like Google consider backlinks as votes. If a webpage gains too many backlinks, search engines think the content may have valuable content, and as a result, the website gets a ranking boost in SERPs.
However, not all backlinks carry the same value; some can badly impact your website’s SEO. Getting links from irrelevant, low-quality websites is considered spammed links.
There are several ways you can build high-quality backlinks to your website. Here’s a few of them:
- Guest posting
- Infographics
- Broken links
- Linkable content
- Write round up posts
Building high-quality links isn’t that easy, and it may take some time. But once you acquire the skills and experience, tasks will be more manageable.
Wrapping Up
One simple and effective way to grow your online business organically is through Search Engine Optimization (SEO). It’s a combination of different processes that help improve your site’s visibility when people search for something.
It is not different for photography websites. SEO for photographers is a great way to promote their online portfolios and attract new business opportunities.
You need to optimize your website and images so that search engines show your pictures on search engine result pages.
There are hundreds of website optimization techniques available, but not all of them are equally important. So, we decided to discuss the most important ones.
In this article, we shared 10 of the best SEO optimization techniques for photographers. They will help you improve your online visibility and bring more clients to your website.
Now, we want to hear from you. Have you implemented any of these Image SEO techniques? Did you see an improvement in your traffic? Let us know!